
So, let's get
started! You may want to grab these things to have on hand:
work gloves
x-acto knife
broom/dust pan
vacuum
trash bags
needle nose pliers
hammer
staple remover tool (if you have one)
pry bar, claw hammer to remove carpet tack strips
spackling/wood filler
hand sander
sand paper
sponge/bucket/soapy water
caulk
paint/paintbrush
My son used an x-acto knife (utility knife) to cut the carpet under the top lip of the
top stair. Then,he grabbed a corner of the carpet and started yanking! Of course, he needed mama's help so I had to get in on the action. This, my friend, is a great way to get some of that pent up frustration out, too! :)


RIPPING OUT THE CARPET VIDEO:
Round 1: ding. ding. The carpet VS. Brandi...Brandi wins! Roll that nasty 18 year old carpet up and put it in the trash! I know what y'all are saying...how could you have 18 year old carpet, Brandi? Well, s*it happens and certain projects get priority over other projects and then there's budget restrictions and time passes and then you're kitty cat gets to be 18 years old and his health isn't that good and you don't want to get new carpet while you're having to clean up after him all the time and time just happens. You can have some relief in knowing that I built this house and we're the only ones who have ever lived here so at least the old carpet ick is just from us. Now, let's move and quit being so judgy.


This is where the broom/dust pan and vacuum come into play. I like to clean up as I go so the dust and crap don't get walked through and tracked through the whole house. Here's where it starts getting fun...JK! This is where the elbow pain starts to happen. Time to remove the carpet padding (easy) and the carpet tack strips (not bad) and the staples (this will make ya cuss for sure!). Ugh! Why did those carpet installers use SO many freakin' staples? You'll see what I'm talking about if you're removing carpet from your stairs. Now, I don't have all the fancy tools like I mentioned above for removing staples and tack strips so these are the 3 tools that I used. Yeah, I'm a beast. I try and work with what I have b/c my budget is tight.


I thought removing the staples for me was the worst part b/c my elbows were so sore from pulling, tugging and yanking so hard but as the job continued I learned there were other parts to this that I hate more. Ha! I told ya I'm not going to lie to you. This job is hard yet rewarding. Two steps down and 15 to go! This part I did over 2 days because I thought I was going to lose my mind and that my right arm might fall off. Just remember no pain no gain. After I finished removing all the padding, tack strips and staples, I moved on to filling all the holes. I started with the wood filler that I had but it was kind of old and hard so I ran to Lowe's and bought some @Fast'N Final lightweight spackling and it's nice, light and airy.


Slowly but surely, I made progress. I was like the little train that could...chugga chugga choo choo!


I had to take a break and work out to go move around and get this body off of those hard stairs for awhile AND I had to reward myself with some zucchini brownies before I could move on to sanding!


Zucchini brownie recipe is to die for and can be found here: https://pin.it/3biO2DO Thank you Crazy for Crust for this yummy recipe!
Ok, back to work. It's time to sand these mofo stairs! Remember how I said I thought pulling the staples out was the worst job? Well, sanding is worse! Since my budget is tight, I'm going to sand the existing wood used for making the stairs because it's good wood just not pretty. When they built the house they knew they were covering the stairs with carpet so they're very unfinished and have some plaster on them, etc. I've seen where some people actually replace or cover the wood here which would save the sanding step but also cuts into the budget more. You decide what's best for you. You'll see here what I think about sanding! I did put a big piece of plastic over the stairs trying to contain the dust a bit and I do think it helped...a little. EVERYTHING will get dusty so get ready for a mess! My son had left to run an errand and came home after I had been sanding awhile and he was like, "What is going on in here? Have I landed in the Sahara Desert or what?" You can chuckle all you want but I actually thought at first I could just sand the stairs by hand to knock off the top uneven layer...yeah, I know. That was a joke! Half way through my first stair, I called my gay neighbors Paul & Ry ( AKA my besties who save me from everything!) and asked to borrow their hand sander. They of course bailed me out once again and let me borrow their @Craftman hand sander. What a life saver!

Meet Paul & Ry (my crazy neighbors!)


The video is just for entertainment purposes. I crack myself up! Haha! Viewer notice...it's a Sunday afternoon and I'm doing manual labor so I'm a la natural. No make up, no cover up, nothing, nada. I maybe had a little trouble pronouncing the word caulk, too. 😂😂😂 You can watch part 1 sanding video here (hit replay button if you don't see me): and part 2 sanding video here (hit replay button if you don't see me):
Once you've finished sanding, vacuum the stairs again. Get some warm, soapy water and a big sponge and wipe down all the stairs really good to clean up the dust. Now, you're ready to CAULK! Remember how I said I hated sanding even more than ripping out the staples. I hate caulking even more now!!! Here comes another funny...I bought one tube of caulk thinking that would cover all the cracks in 17 steps. Uhhhh, no. Try 9 tubes of caulk was needed for this project. I misjudged that, too! Caulking was easy on the small cracks but it was a b*tch on the larger cracks. One things for sure, I'm putting professional caulker on my resume now. I bought @White Lightning 3006 All Purpose Quick Dry Caulk @Lowes.


Look at that caulk, baby! That is a piece of work in itself. Another truth, the caulking took me a couple of days just because I'd get so frustrated. You're laying on the stairs trying to get up under the lip and you're at weird angles and everything hurts so it's not a pleasant job. Thank you to all the caulk layers out there. You're much appreciated after I finished this job. Can we please paint now? YAAAASSS!
It's time to paint the primer/base coat. I painted two coats of white on all the stairs and the sides.


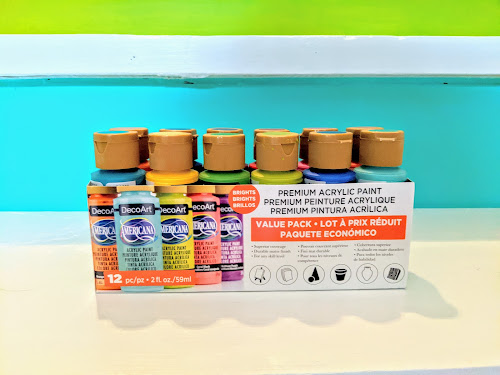
Holla! I do have to say the house feels much cleaner just having the carpet off of the stairs. It took me awhile to figure out what my color scheme was going to be. I knew I wanted it to be a party so I'm going with multiple, bright colors. I debated doing an ombre but in the end I'm glad I went with what I did. There's some really fun ideas out there though that you can do...patterns, mural, ombre, wallpaper the backs of the stairs, etc. After I painted two coats of white paint on, I let it dry over night and then FINALLY 11 days later I painted the colors on! Whoop! To be honest, I didn't know if this day would ever come! I ended up using a 12 pk of bright acrylic paint by @Deco Art Americana that I bought from Hobby Lobby. I think the 12 pk of paints was $12.99 and then applied the 40% off coupon off in the Hobby Lobby app so they ended up costing about $8.99 instead. 


#diy #handmade #art #homedecor #love #design #woodworking #interiordesign #home #fashion #wood #decor #style #doityourself #instagood #maker #vintage #nyc #craft #artist #crafts #creative #jewelry #photography #makersgonnamake #smallbusiness #painting #pinterest #woodwork #lowes #craftsman #hgtv #whitelightning #fastnfinal #x-acto #fixinmyex'smesses #yougotthis #girlpower